Table of contents
This article was originally published here
Fetching and rendering data from APIs is one of the core essentials of front-end development. The basic way of fetching data in JavaScript is to use local fetch or a third-party library like axios, input the right HTTP method for the request, including headers, parse the result in JSON, and render it to the DOM. This wouldn’t work well with modern web applications because of their architectures' complexity. Users will only use a web app that’s fast, reliable, and responsive; that means if they request a resource, they want it delivered in <3s. As a result, developers need to use tools or libraries that improve the data-fetching experience in their applications.
In React, data fetching is a side effect, and it provides the useEffect Hook for performing this side effect. Data fetching in React typically would look like this:
function Example() {
  const [data, setData] = useState(null);

  useEffect(() => {
    async function fetchData() {
      const response = await fetch('https://api.example.com/data');
      const result = await response.json();
      setData(result);
    }

    fetchData();
  }, []); // The empty array `[]` ensures the effect only runs once on mount and unmount.

  return (
    <div>
      {data ? (
        <div>{JSON.stringify(data)}</div>
      ) : (
        <div>Loading...</div>
      )}
    </div>
  );
}
However, when building server-rendered applications, Nextjs is preferred. Data fetching in Next.js can be done using different methods, depending on the desired rendering strategy, that is:
When you want to fetch data at build time and generate static HTML pages, Nextjs provides
getStaticPropsfor that.When you have dynamic routes and want to generate static HTML pages for each route, use
getStaticPaths.When you need to fetch data on each request, providing a server-rendered experience, use
getServerSidePropsYou can still use client-side data fetching when you don't need to pre-render the data or when you want to fetch data that depends on user interactions.
It is common to see Next.js applications that make use of client-side data fetching. The challenge with this technique of data fetching is that you have to render data based on user interaction, which can lead to several issues if not handled properly.
This is why Vercel created SWR (stale-while-revalidate). Without a solution like SWR, you’re likely to face difficulties managing caching, ensuring data synchronization, handling errors, and providing real-time updates. Additionally, handling loading states can become cumbersome, and you might end up with a lot of boilerplate code just for fetching, caching, and managing the data as the codebase grows. SWR addresses these challenges by providing built-in caching, automatic cache revalidation, error retries, support for real-time updates, and a Hooks-based API that simplifies data management.
In this article, I’ll introduce you to how SWR works, its key concepts, and how to use it for efficient data fetching in client-side Next.js applications.
How SWR works
To understand how SWR works, you need to be conversant with these key concepts.
Caching: Caching is like storing food in the fridge. It's a way to save data so it can be quickly accessed later without needing to fetch it from the source (server) every time. This speeds up the process of retrieving data and reduces the load on the server.
Revalidation: Revalidation is like checking if the food in the fridge is still good or needs replacing with a fresh meal. In the context of data fetching, revalidation means checking if the cached data is still valid or if it needs to be updated with new data from the server. With SWR, this process happens automatically in the background, ensuring your data is always up-to-date.
Stale-While-Revalidate: Imagine you have a fridge with food inside. When you're hungry, you grab something from the fridge (cached data). At the same time, a friend starts cooking a fresh meal (fetching new data). You eat the food from the fridge while waiting for the fresh meal to be ready. Once done, the fridge is restocked with fresh food (cache revalidation).
SWR is a data fetching library that implements the Stale-While-Revalidate (SWR) strategy. It fetches, caches, and revalidates data in the background to provide an efficient and seamless user experience.
What we’ll be building
To appreciate SWR, you need to build something with it. In this tutorial, we’ll build a product store with Nextjs. While building this demo app, you’ll get to learn the following:
Fetching data using the
useSWRhookHandling Errors and Loading States
Implementing optimistic UI updates with SWR
Implementing infinite scrolling in Next.js with SWR
Pre-requisites
You’ll need the following:
Nodejs ≥v16
Code editor (preferably VS code)
Code terminal
Package manager (yarn preferably)
Knowledge of JavaScript and Reactjs
The complete code is on Github, and the demo app is here.
Getting Started
Run this command on your terminal to create a nextjs project.
npx create-next-app product-store; cd product-store; code .
The product store will have a /product parent route with these sub-routes: /product/listing and /product/detail. Run this command from the root directory on your terminal to create these page routes.
cd pages; mkdir product; cd product; touch [id].js upload.js
Go back to the root directory and create these UI components
mkdir components; cd components; touch ProductList.jsx ProductCard.jsx ErrorMessage.jsx LoadingIndicator.jsx ProductUploadForm.jsx
Navigate back to the root director and install these packages:
yarn add swr tailwindcss postcss autoprefixer react-infinite-scroll-component;
See how to configure tailwindcss here.
Fetching, Displaying, and Updating Data with SWR
Firstly, let’s create a custom React hook that’ll fetch data from the Products fakeapi endpoint using SWR. Add these lines of code to hooks/useFetch.js
import useSWR from 'swr';

const fetcher = async (url) => {
  const response = await fetch(url);
  if (!response.ok) {
    throw new Error('An error occurred while fetching the data.');
  }
  return response.json();
};

const useFetch = (path) => {
  const { data, error } = useSWR(`https://fakestoreapi.com/${path}`, fetcher);

  const isLoading = !data && !error;

  return { data, error, isLoading };
};

export default useFetch;
Here, we define a custom React hook, useFetch, which leverages the useSWR hook for data fetching. It takes a path as input and constructs a full URL to fetch data from the Fake Store API. The fetcher function handles making the request and error checking. useFetch returns an object with the fetched data, potential errors, and a loading state.
Now let’s display the product list.
Navigate to components/ProductCard and add these lines of code.
import Link from 'next/link';
import Image from 'next/image';

const ProductCard = ({ product }) => {
    return (
        <div className="bg-white rounded-lg shadow-md p-4">
            <Image
                src={product.image}
                alt={product.title}
                width={640}
                height={640}
                layout="responsive"
            />
            <h3 className="text-lg font-semibold mb-2">{product.title}</h3>
            <p className="text-gray-600 mb-2">{product.category}</p>
            <div className="flex justify-between items-center">
                <span className="text-lg font-bold">${product.price}</span>
                <Link
                    href={`/product/${product.id}`}
                    className="text-blue-600 hover:text-blue-800"
                >
                    View Details
                </Link>
            </div>
        </div>
    );
};

export default ProductCard;
This ProductCard component renders a single product card. The card includes an image, product title, category, price, and a link to the product details page. The image is set using Next.js' Image component, which automatically optimizes the image for performance. The link to the product details page is wrapped in Next.js' Link component for client-side navigation.
Navigate to component/ProductList.jsx and add these lines of code.
import useFetch from './hooks/useFetch';
import ProductCard from './ProductCard';

const ProductList = () => {
  const { data: products, error, isLoading } = useFetch('products');

  if (isLoading) {
    return <div>Loading...</div>;
  }

  if (error) {
    return <div>Error: {error.message}</div>;
  }

  return (
    <div className="grid grid-cols-1 md:grid-cols-2 lg:grid-cols-3 gap-4">
      {products.map((product) => (
        <ProductCard key={product.id} product={product} />
      ))}
    </div>
  );
};

export default ProductList;
Here, we define the ProductList component, which fetches and displays a list of products. It uses the useFetch custom hook to fetch product data and ProductCard to render each product. The component handles loading and error states and displays the products in a grid format.
Update pages/index.js with these lines of code.
import ProductList from "../components/ProductList"

export default function Home() {
  return (
    <div className='max-w-screen-xl m-auto'>
      <ProductList />
    </div>
  )
}
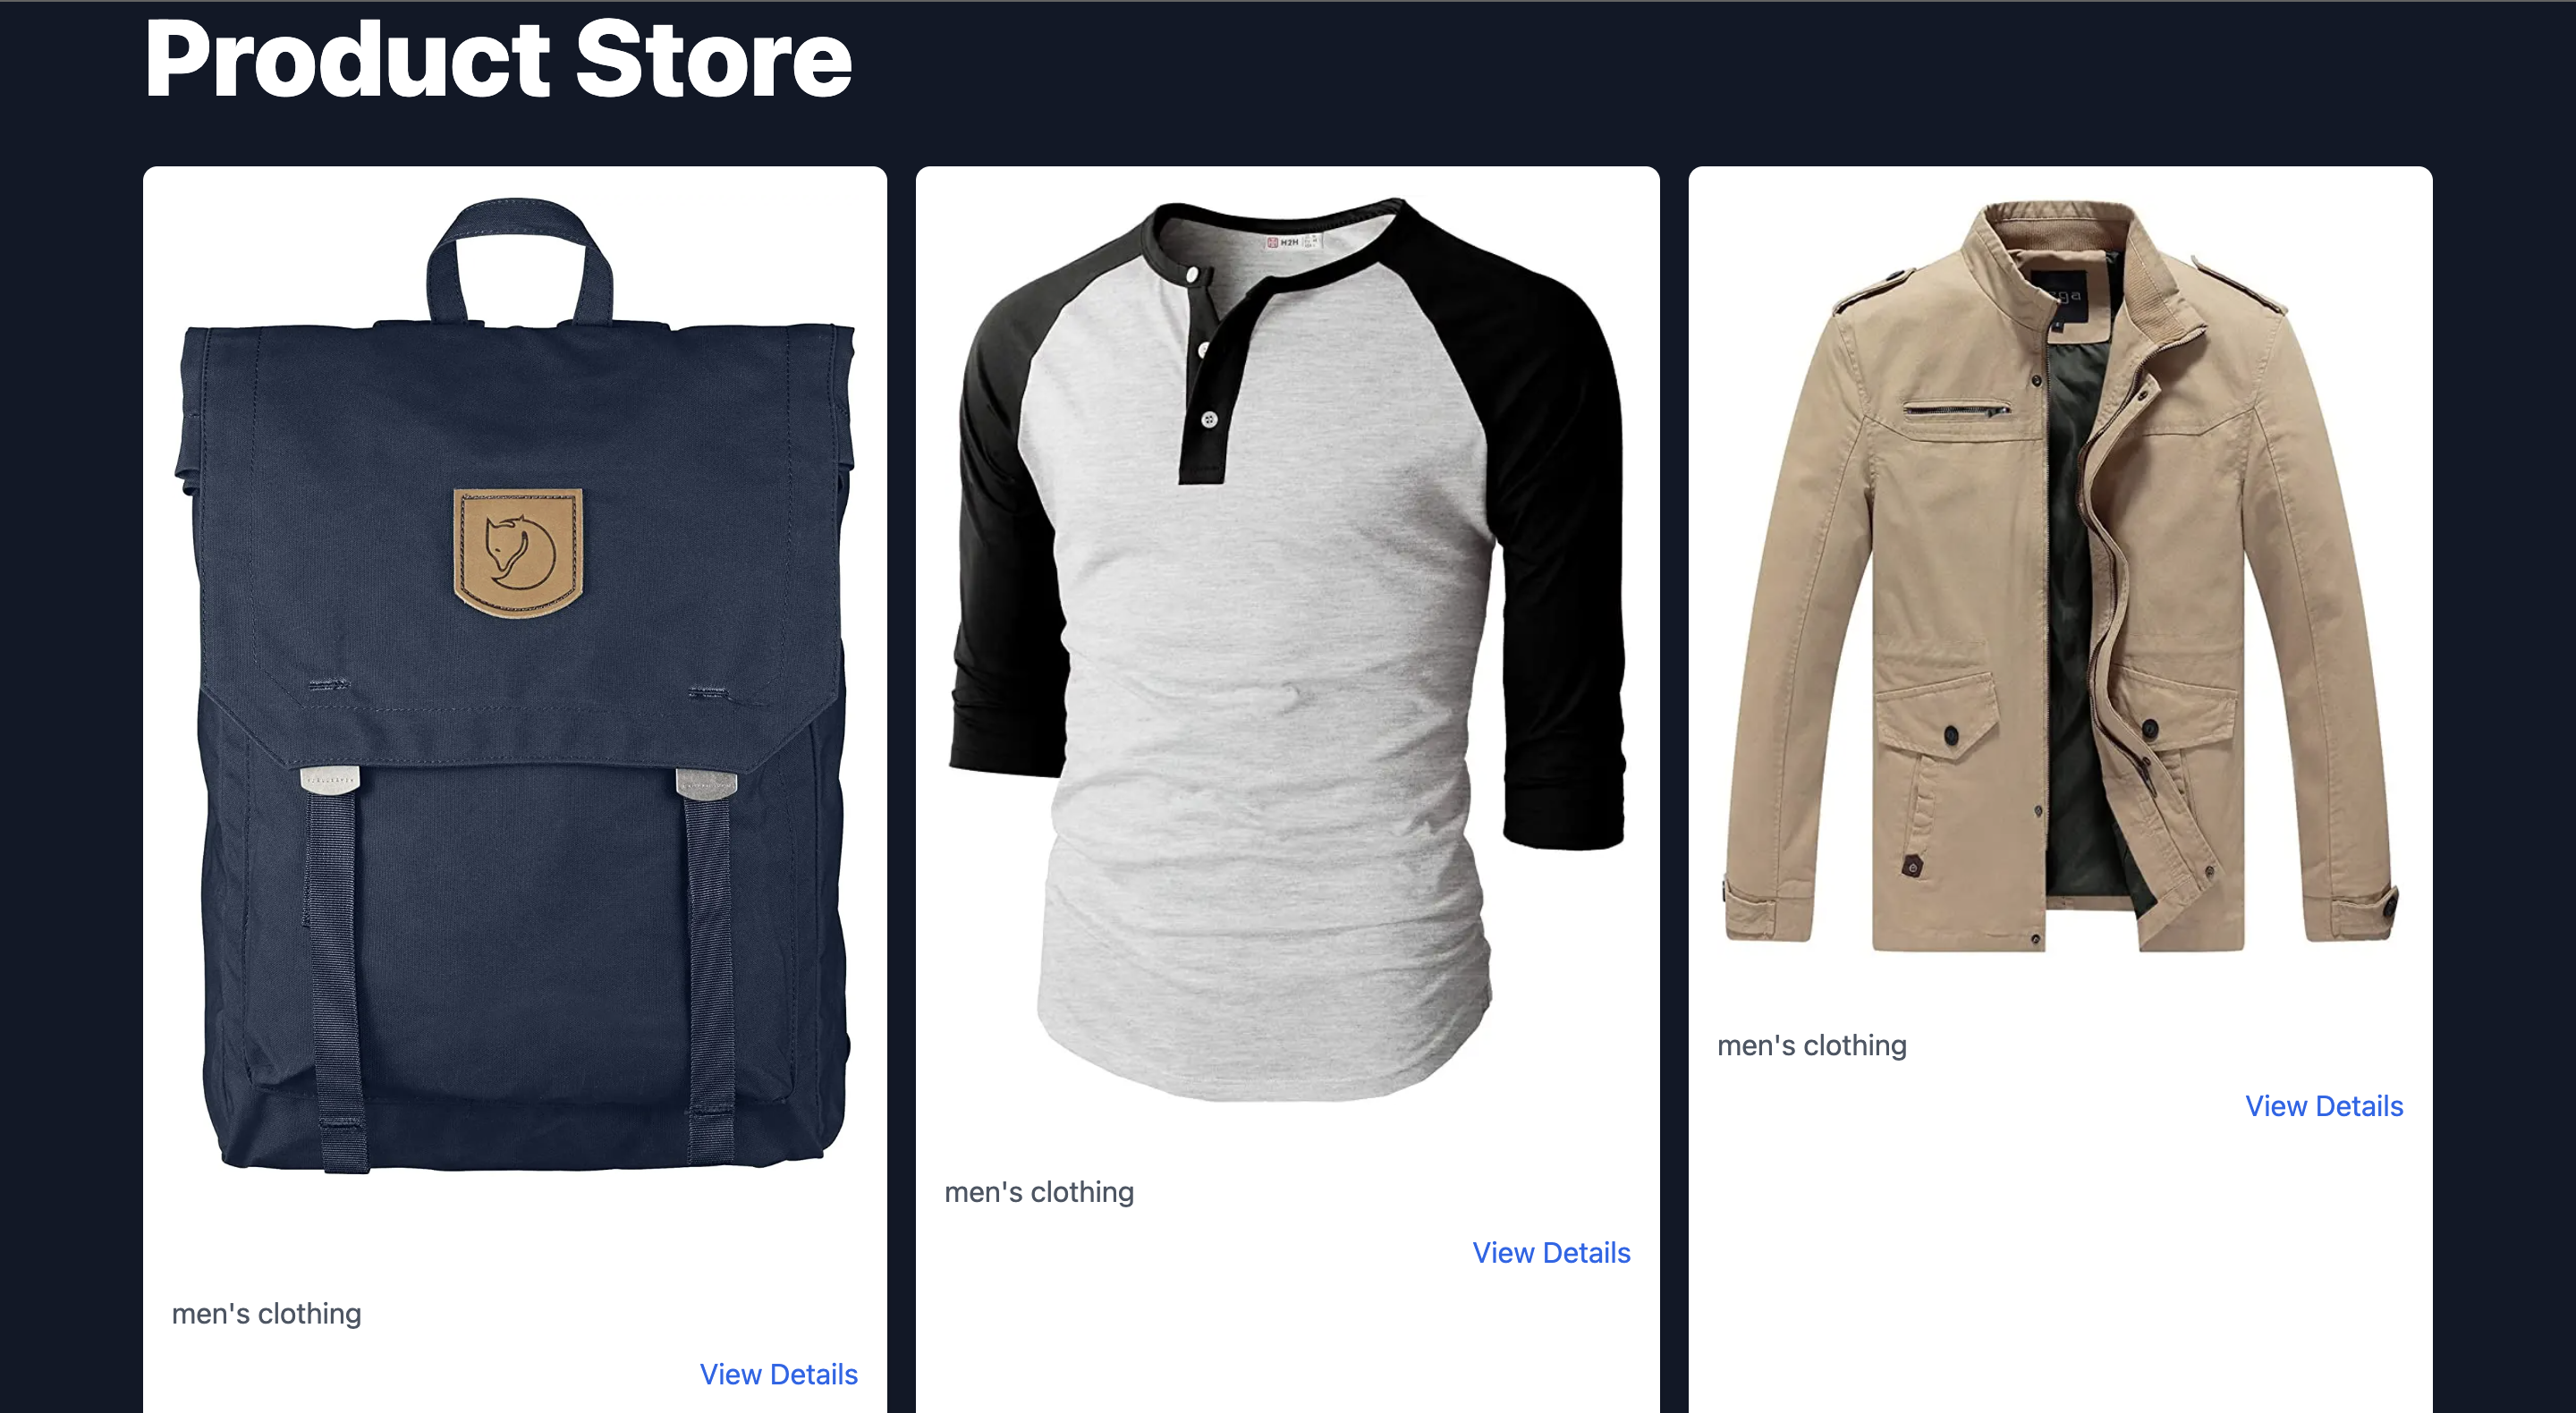
Run the dev server with this command yarn dev, it should start the server at [http://localhost:3000](http://localhost:3000), and you should see something like this on your browser.

Great! We’ve been able to display the products. Let’s now implement the view for a single product. Update pages/product/[id].js with these lines of code. Here we’ll use useSWR directly.
import useSWR from "swr";
import Image from "next/image";

const fetcher = async (url) => {
  const response = await fetch(url);
  if (!response.ok) {
    throw new Error("An error occurred while fetching the data.");
  }
  return response.json();
};

const ProductDetails = ({ id }) => {
  const {
    data: product,
    error,
    isLoading,
  } = useSWR(`https://fakestoreapi.com/products/${id}`, fetcher);

  if (isLoading) {
    return <div>Loading...</div>;
  }

  if (error) {
    return <div>Error: {error.message}</div>;
  }

  return (
    <div className="max-w-2xl mx-auto min-h-screen py-16">
      <h1 className="text-2xl font-semibold mb-4">{product.title}</h1>
      <div className="md:flex space-x-8">
        <div>
          <Image
            src={product.image}
            alt={product.title}
            width={640}
            height={640}
            layout="responsive"
          />
        </div>
        <div>
          <p className="text-gray-100 mb-2">{product.category}</p>
          <p className="text-xl font-bold mb-4">${product.price}</p>
          <p>{product.description}</p>
        </div>
      </div>
    </div>
  );
};

export async function getServerSideProps(context) {
  const { id } = context.query;
  return {
    props: {
      id,
    },
  };
}
export default ProductDetails;
This component handles loading and error states and renders product information. The getServerSideProps function retrieves the product ID from the query params, which is passed as a prop to the component for server-side rendering. A single product detail look like this:

Handling Errors and Loading States
SWR provides an ErrorBoundary component that can be used to catch errors that occur within its child components. This component can be used to display a fallback UI when an error occurs, such as an error message or a reload button. The Error boundary provides a way to separate an application's data-fetching and data-rendering concerns. When an error occurs during data fetching, SWR Error Boundary can intercept and handle it gracefully. This way, error messages can be displayed to the user without breaking the entire application.
import useSWR from 'swr';
import { SWRConfig } from 'swr';
import { ErrorBoundary } from 'react-error-boundary';

function App() {
  const { data, error } = useSWR('/api/data');

  if (error) {
    throw new Error('Failed to load data');
  }

  return <div>{data}</div>;
}

function AppWrapper() {
  return (
    <ErrorBoundary fallback={<div>Failed to load data</div>}>
      <SWRConfig value={{}}>
        <App />
      </SWRConfig>
    </ErrorBoundary>
  );
}
In this code snippet, if an error occurs during the fetching process, it throws an error, which is caught by the ErrorBoundary component. The fallback prop of the ErrorBoundary component is a UI to be displayed when an error occurs. In this case, it displays a simple error message.
Implementing loading indicators for a better user experience
Let’s go back to building our app. Go to component/LoadingIndicator.jsx and add these lines of code.
const LoadingIndicator = () => {
  return (
    <div className="flex justify-center items-center">
      <div className="animate-spin rounded-full h-10 w-10 border-b-2 border-blue-500"></div>
    </div>
  );
};

export default LoadingIndicator;
This LoadingIndicator component will be used to represent the loading states while fetching data. Head to components/ProductList.jsx and modify the code to this:
if (isLoading) {
    return <LoadingIndicator />;
  }
Let’s also create an ErrorMessage component that renders an error message when there are data fetching issues. Head to components/ErrorMessage.jsx:
const ErrorMessage = ({ message }) => {
  return (
    <div
      className="bg-red-100 border border-red-400 text-red-700 px-4 py-3 rounded relative"
      role="alert"
    >
      <strong className="font-bold">Error: </strong>
      <span className="block sm:inline">{message}</span>
    </div>
  );
};

export default ErrorMessage;
Update component/ProductList.jsx like this:
if (error) {
    return <ErrorMessage message={error.message} />;
  }
Optimistic UI updates
When you POST a message in messaging apps, it is immediately displayed in the chat even if there’s no network connection. That’s the idea of optimistic UI updates, and this can be implemented with SWR. With SWR, you can update the local cache of the data in response to user actions while at the same time sending the update request to the server. If the server responds with an error, the local cache can be reverted back to its previous state. This way, the user gets an immediate response while still having the assurance that the data is being updated on the server.
To implement optimistic UI updates with SWR, you need to use the mutate function provided by the hook. The mutate function allows you to update the cache of the data without making a request to the server. You can pass an updater function to the mutate function, which receives the current data as an argument, and returns the updated data. The mutate function updates the local cache with the new data, and triggers a re-render of the component.
Once the update request is sent to the server, you can use the mutate function again to update the cache with the response from the server. If the server responds with an error, you can use the mutate function with the previous data to revert the cache to its previous state.
This is how to implement optimistic UI updates in our app while uploading a new product.
pages/product/upload.js
import ProductUploadForm from "../../components/ProductUploadForm";
import { mutate } from "swr";
import axios from "axios";
import ErrorMessage from "../../components/ErrorMessage";

const upload = () => {
  const onUpload = async (newProduct) => {
    // Optimistically update the local data
    mutate(
      "/products",
      (products) => {
        if (Array.isArray(products)) {
          return [newProduct, ...products];
        }
        return [newProduct];
      },
      false
    );

    // Make the API call to create the product
    try {
      await axios.post("https://fakestoreapi.com/products", newProduct);

      // Revalidate the data after successful upload
      mutate("/products");
    } catch (error) {
      // Handle any errors
      <ErrorMessage message={error} />;
    }
  };

  return (
    <div>
      <h1 className="mb-4 text-2xl  p-3 font-extrabold text-gray-900 dark:text-white md:text-3xl lg:text-4xl">
        {" "}
        Upload Product
      </h1>
      <ProductUploadForm onUpload={onUpload} />
    </div>
  );
};

export default upload;
Check out the ProductUploadForm.jsx here.
Using SWR for paginated data fetching
Paginated data fetching is one of the use cases of SWR. If we're fetching a large amount of data, breaking it down into smaller chunks called pages improves performance and reduces the amount of data transferred over the network.
The useSWRInfinite hook implements pagination with SWR. It takes two arguments: getKey and fetcher.
The getKey function returns a unique key for each page based on the page index and previous page data. Returning null for an empty page prevents unnecessary requests.
The fetcher function fetches data for a given key using an HTTP client, like axios or fetch.
Once we set up the useSWRInfinite hook, we can use the data and error properties to render the data and handle errors, respectively. We can also use the isLoading property to show a loading indicator while data is being fetched.
To implement pagination, we use the size and setSize properties to control the number of pages to fetch. Incrementing the size value in a loadMore function that's called when the user reaches the end of the current page enables pagination. We also use the hasNextPage property to determine if more data can be fetched.
Implementing infinite scrolling in Next.js with SWR
Update the useFetch hook with these lines of code:
import useSWRInfinite from "swr/infinite";

const fetcher = async (url) => {
    const response = await fetch(url);
    if (!response.ok) {
        throw new Error('An error occurred while fetching the data.');
    }
    return await response.json();
};

const useFetch = (path, limit) => {
    const getKey = (pageIndex, previousPageData) => {
        if (previousPageData && !previousPageData.length) return null;
        const pageNumber = pageIndex + 1;
        return `https://fakestoreapi.com/${path}?_page=${pageNumber}&_limit=${limit}`;
    };

    const { data, error, size, setSize } = useSWRInfinite(getKey, fetcher);

    const loadMore = () => setSize(size + 1);

    return {
        data: data ? data.flat() : [],
        isLoading: !error && !data,
        isError: error,
        loadMore,
        hasNextPage: data && data[data.length - 1]?.length === limit,
    };
};

export default useFetch;
In this code snippet is a custom hook that uses the SWR library to fetch paginated data. It takes two arguments, the path, and limit . The getKey function returns a unique key for each page based on the page index and previous page data. The hook uses the useSWRInfinite function to fetch data for a given key using an HTTP client. It returns an object with data, isLoading, isError , loadMore , and hasNextPage properties. The data property is an array of fetched data, while isLoading is a boolean value that indicates if the data is being fetched. isError is a boolean value that indicates if an error occurred while fetching data. loadMore is a function that increments the number of pages to fetch, and hasNextPage is a boolean value that indicates if there's more data to be fetched. The fetcher function is called to fetch data from a given URL, and it throws an error if the response is not successful.
The app should work properly with infinite scrolling now:
Wrapping up…
SWR is a powerful tool for efficient data fetching in client-side Next.js applications. Its built-in caching, automatic cache revalidation, error retries, support for real-time updates, and Hooks-based API make data management simpler and more streamlined. By using SWR, developers can improve the data-fetching experience for their users and ensure their applications are fast, reliable, and responsive. With Next.js, there are different methods of data fetching, depending on the desired rendering strategy. While client-side data fetching is a popular option, it can lead to several issues if not handled properly. SWR addresses these challenges and provides a more efficient way of managing data.
Overall, SWR is a great tool for building high-performance, scalable, and reliable web applications with React and Next.js.
Resources
SWR Official Documentation: swr.vercel.app/docs/getting-started
Next.js Documentation on Data Fetching:
An Introduction To SWR: React Hooks For Remote Data Fetching:
Data fetching in React with SWR
dev.to/ibrahimraimi/data-fetching-in-react-..GitHub Discussions and Conversations: github.com/vercel/swr/discussions](github.com/vercel/swr/discussions)

